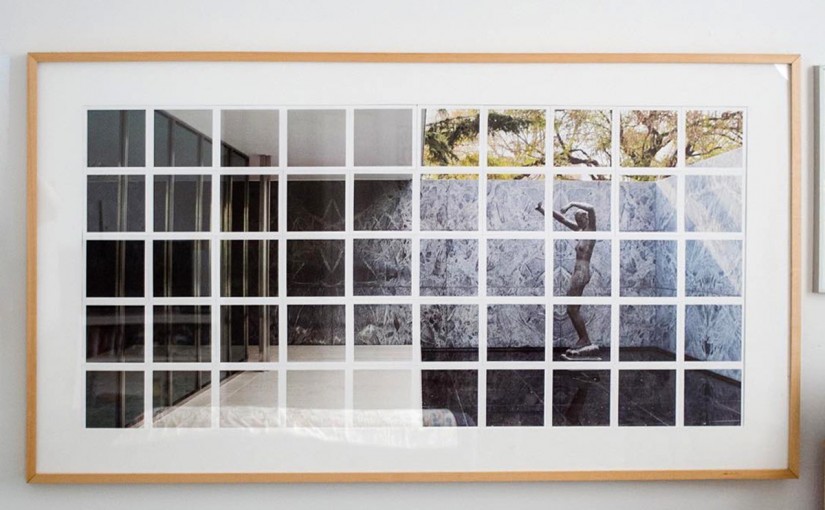
When we spotted Alex’s giant photo grid (made with our Square Prints!) on Instagram we flipped out over how good it looked – and regrammed it so fast.
We got a lot of questions along the lines of “how did he do that?” So, we’re here to answer.
We’ve gathered three, yup three, ways to turn one photo you love into an amazing photo grid.
And, if you want to try it out yourself, remember our 4” Square Prints are always free (yup, $0.00 + shipping). You can upgrade to a set of 5.5” prints for just $5 – and make an extra big grid.
The Quickest Way to Make a Little Grid
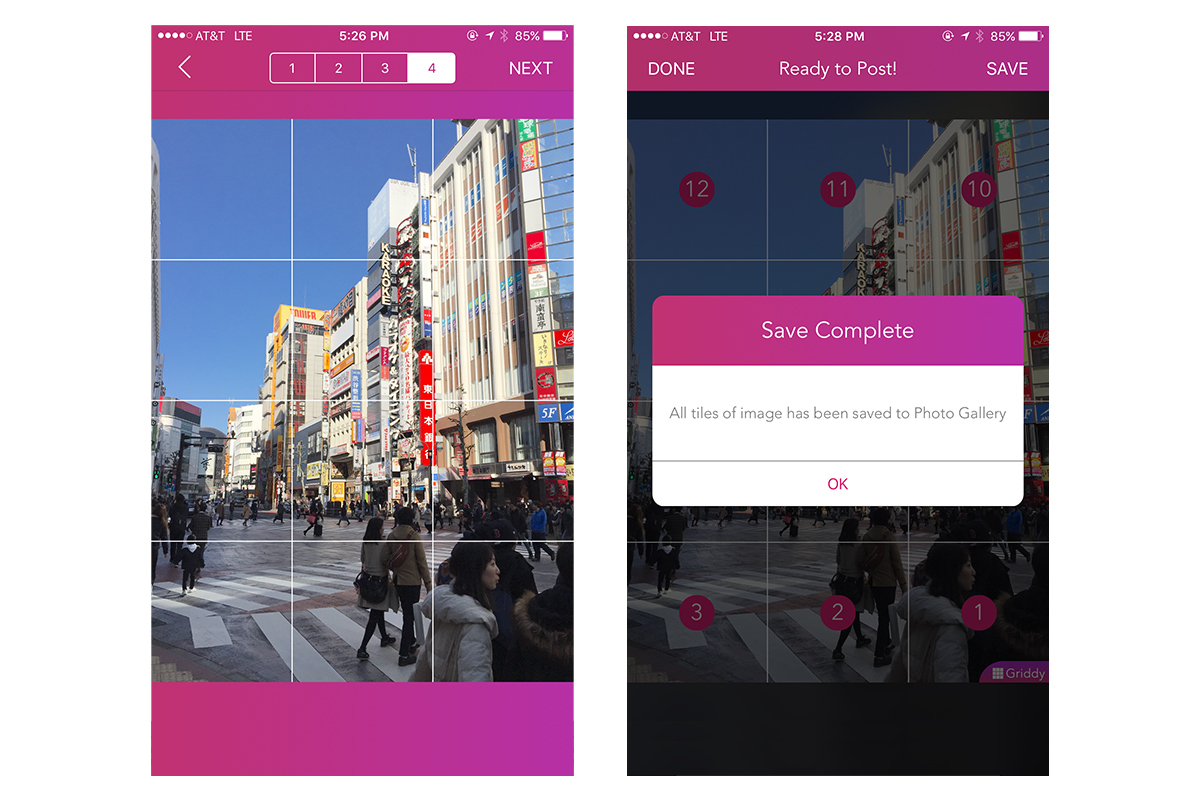
There are apps made to help you split up a photo, so you can post pieces to Instagram to make one big photo show up when you look at your profile (neat, huh?).
We used Griddy to divide up a shot into a 3 x 4 grid. The only downside is that you can only make a grid three photos wide, since it’s designed to go on Instagram.
Want a bigger grid? Keep scrolling.
Let The Internet Split It Up for You
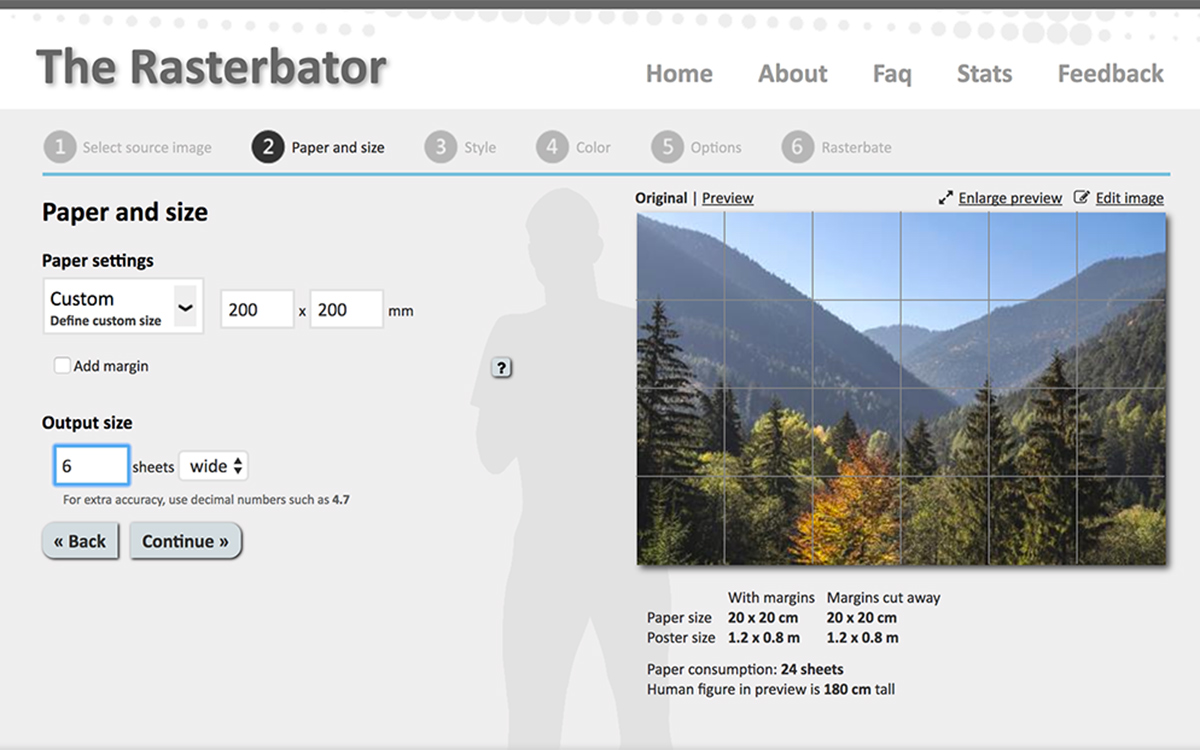
Rasterbator.net is a great site for splitting up your photo. Unfortunately, it doesn’t work so well on your phone, so you’re going to need to grab a compy for this one.
Upload the photo of your choice and change “Paper Setting” to “Custom.”
Set the dimensions to 200mm x 200mm. This will make the square photo files that are generated, plenty big enough to print on our 4″ or 5.5″ squares.
Uncheck the “Add margin” option – our Square Prints already have a border, so you don’t want to double up.
Adjust the “Output Size” till the preview is split up just how you like it. Click on through the next few screens and your photo will be split up as if by magic (or computer … same thing?)
One slight hitch here is that Rasterbator spits out your newly split squares as a PDF, so you’ll need to export the pages as jpgs, or use an online converter (like this one) before you place your order.
Photoshop It Up (Just Like Alex)
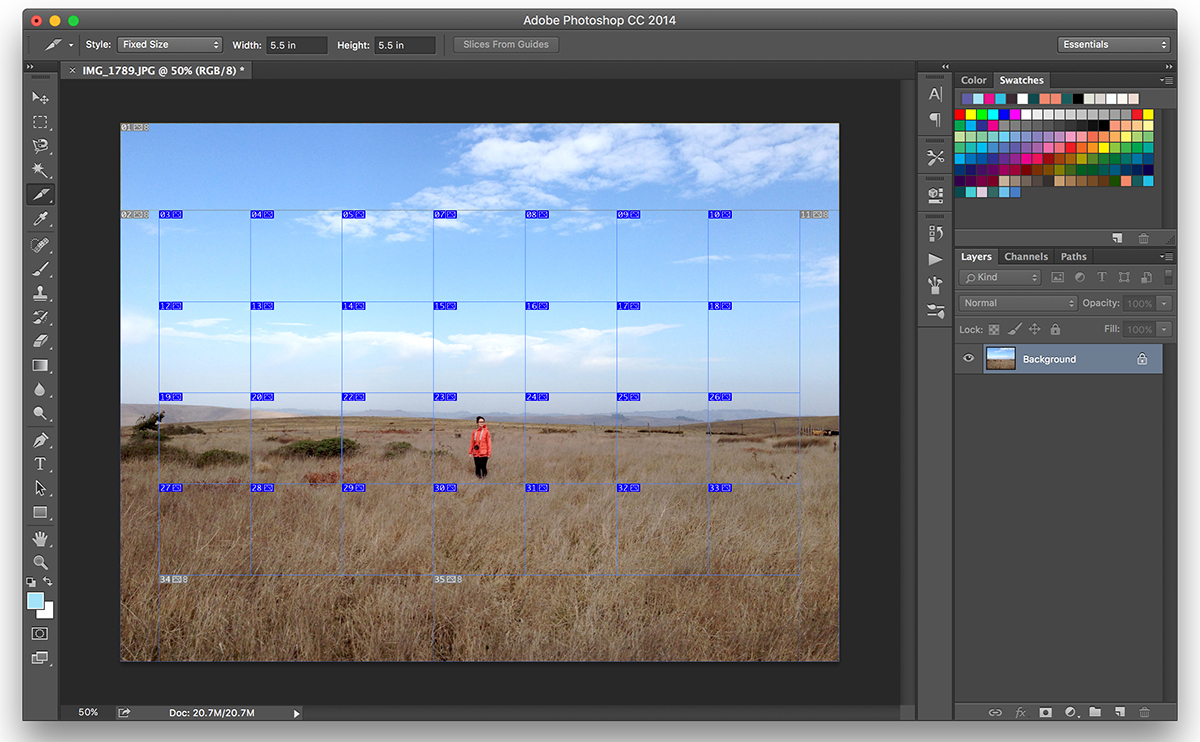
Alex used Photoshop, so if you’ve got access to the Creative Cloud, you can can do the splitting yourself.
Grab that “Slice” tool (right click on crop to find it). Set it to fixed aspect ratio (1:1).
We put the first slice over the part of the photo that we definitely wanted intact (our pal Darby there in the middle), then lined up more slices in a grid around it.
Finally, “Save for Web” and you’ll get a folder full of jpegs just waiting to be ordered up as Square Prints.
Try it Out for Free
Grab a set of 20, 4″ Square Prints for free, or just $5 for a set of 5.5” squares – just pitch in for shipping.
Use the #parabopress when you post a photo of your creation. We want to see it!


