Our photo papers are sooooo nice!
“How nice are they?”
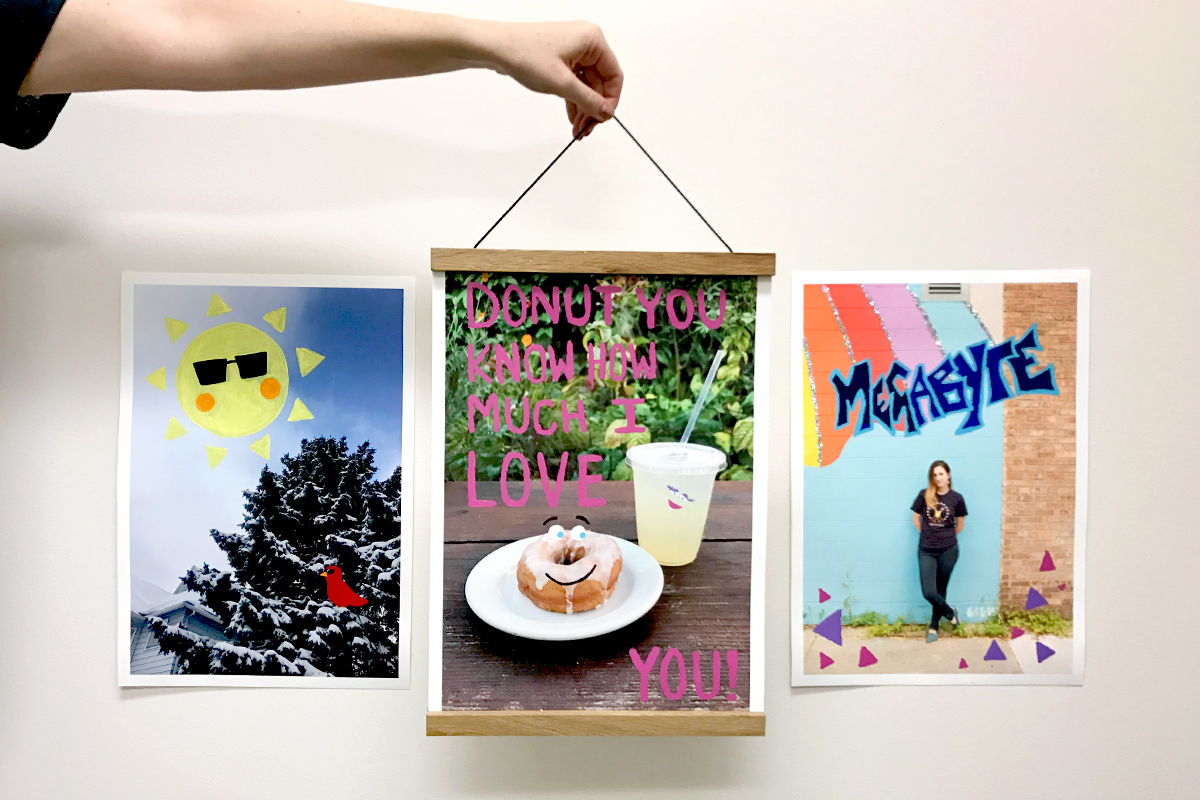
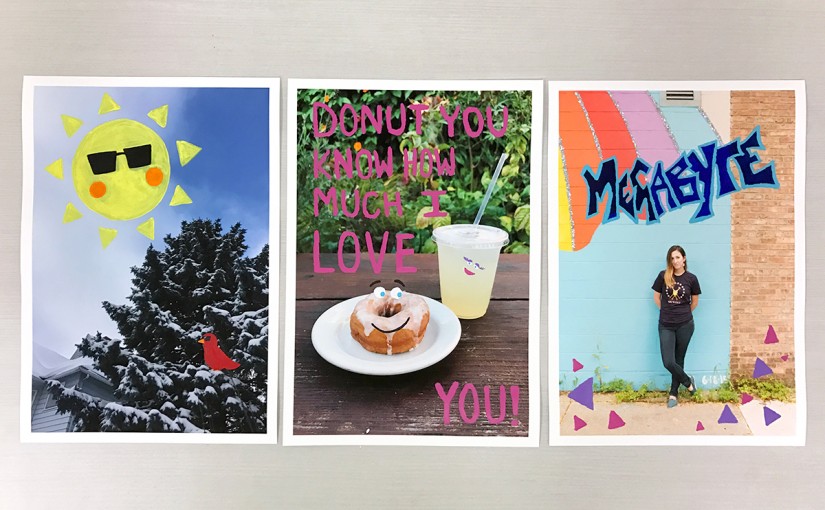
Thanks for asking. They’re so nice and thick and gloriously matte, that you can paint right on them. So we did!
See just how to turn your photo prints into paintastic masterpieces – even if you’re not a natural born Picasso.
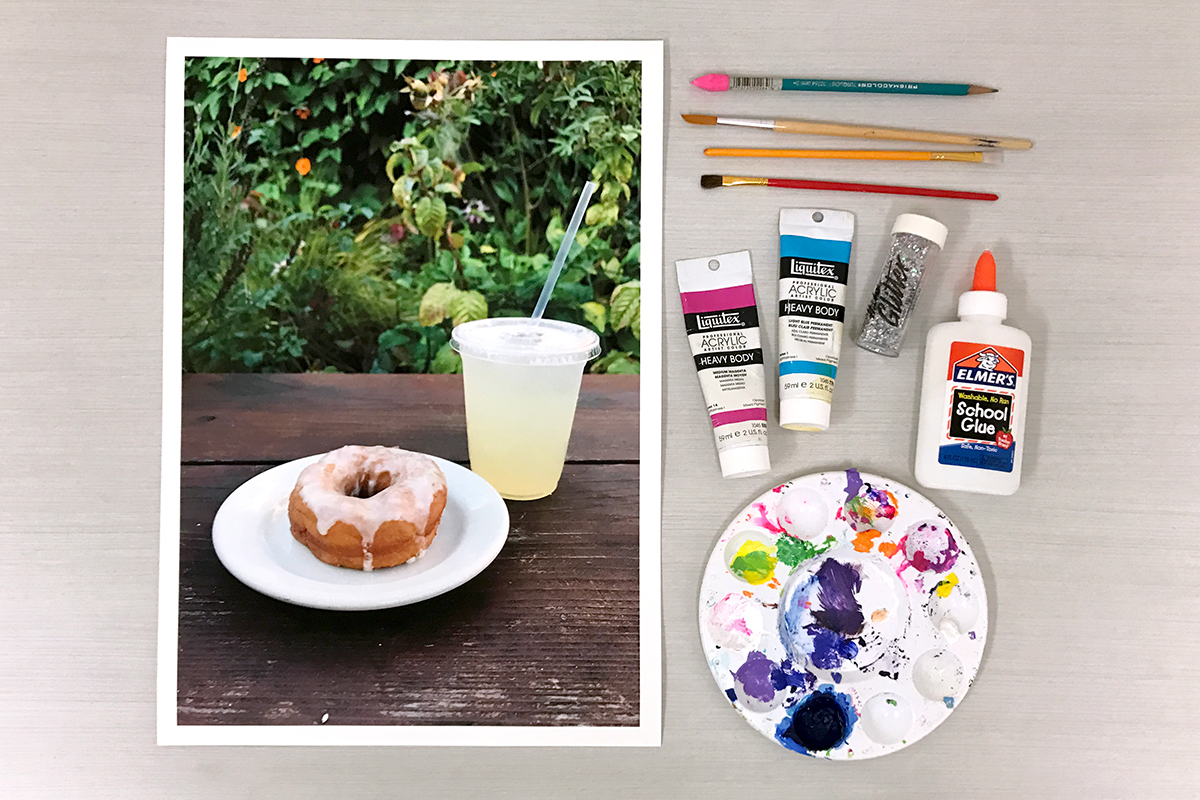
Ingredients:
Photo prints to paint on, a pencil and paints (acrylics work best).
That’s about it, but if you want to add glue and glitter – like we did – we won’t complain.
Oh, and throw on some fun tunes. We listened to a “chill pop” playlist, which is probably why our paintings turned out so cute.
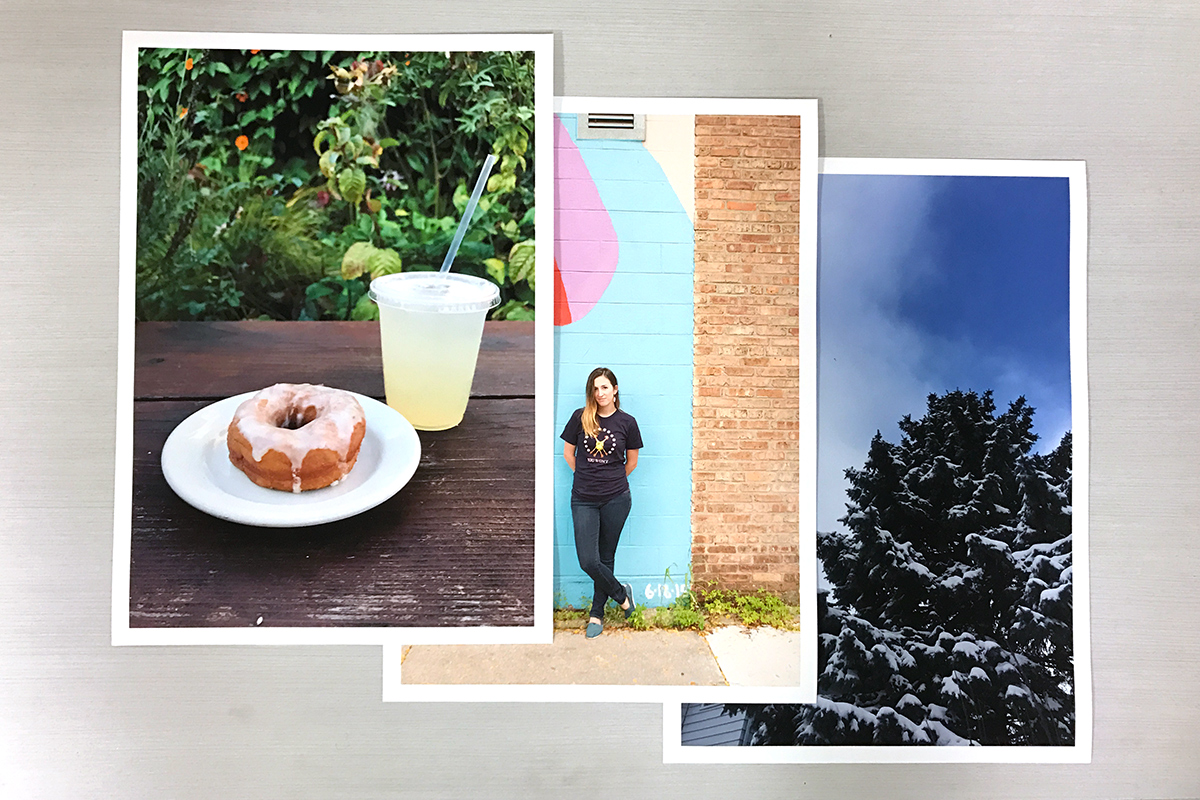
STEP 1: PICK YOUR PIC
If you don’t already have a plan in mind for what you want to paint, choose any photo with a lot of blank(ish) space to spruce up, like a big sky or wall. Dark colors work well if you want to make light paint show up. Light colors are a friend to dark paints.
Order up that photo as a Fine Art Print, like we did, or in a set of Square Prints, if you prefer to start small. Both types of prints are thick enough to paint on.

STEP 2: MAKE A PLAN
Use a pencil to draw your design onto your print. You can freehand it, or if you’d like to be extra precise, you can print out a design or some letter art of your favorite saying and transfer it onto you print.
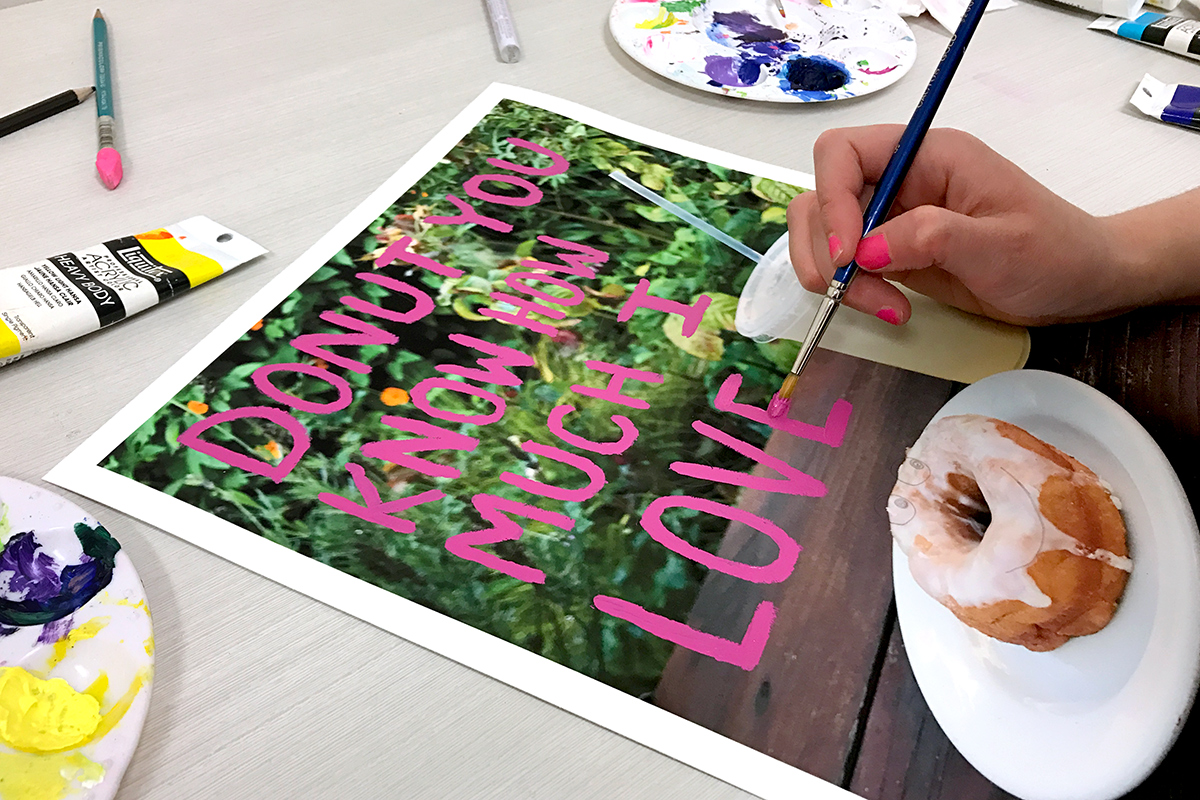
STEP 3: PAINT PARTY
Now pick up a brush and get to painting. We used acrylic paints. You can use paint pens, oil pastels, almost anything will do.
Be sure not to add too much water, so you don’t make the paper buckle (it can take moisture, but only so much).
Go nuts. Lay down a little glue and add glitter!
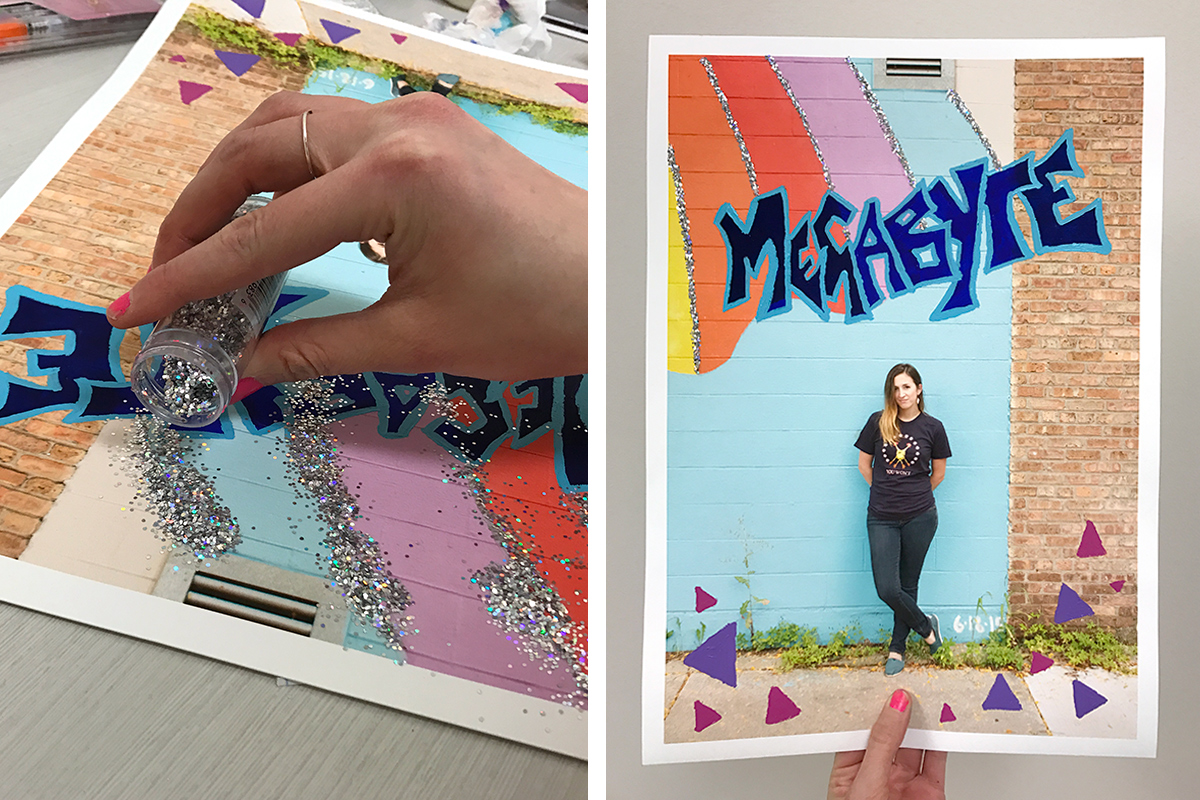
STEP 4: WATCH PAINT DRY
Ooooh, the fun part.
You’re done. Now, hang it up!
We used our 12″ Wood Rails.